Thursday 25 July 2013

BEV 551-Livery and details

I've been having a good look at that one remaining photo of a working BEV 551. I even bought a copy of Industrial Narrow Gauge Railways of Britain, hoping for a slightly better version.
Here it is again:


First, note A and B. A is a cable running into the battery box, repeated at the other end. No clue as to what for (other than "to carry electricity"), but handy to know it was there.
B is some sort of data plate-maybe the works plate, maybe battery data, could be anything cos I can't read it! Hopefully a better copy of the original would show it up, if I ever find it.

C and D are more useful now though. Note how in oval D, the back of the bufferbeam and part of the frames is just distinguishable in the shadow. It seems to be a lighter colour than the black middle section, which isn't in shadow.
C shows how the buffer beam looks a lighter colour, but with the edges in a darker shade. For reference, here is it built up:

Obviously a junior SGLR member was used to recreate (ish) the other photo!

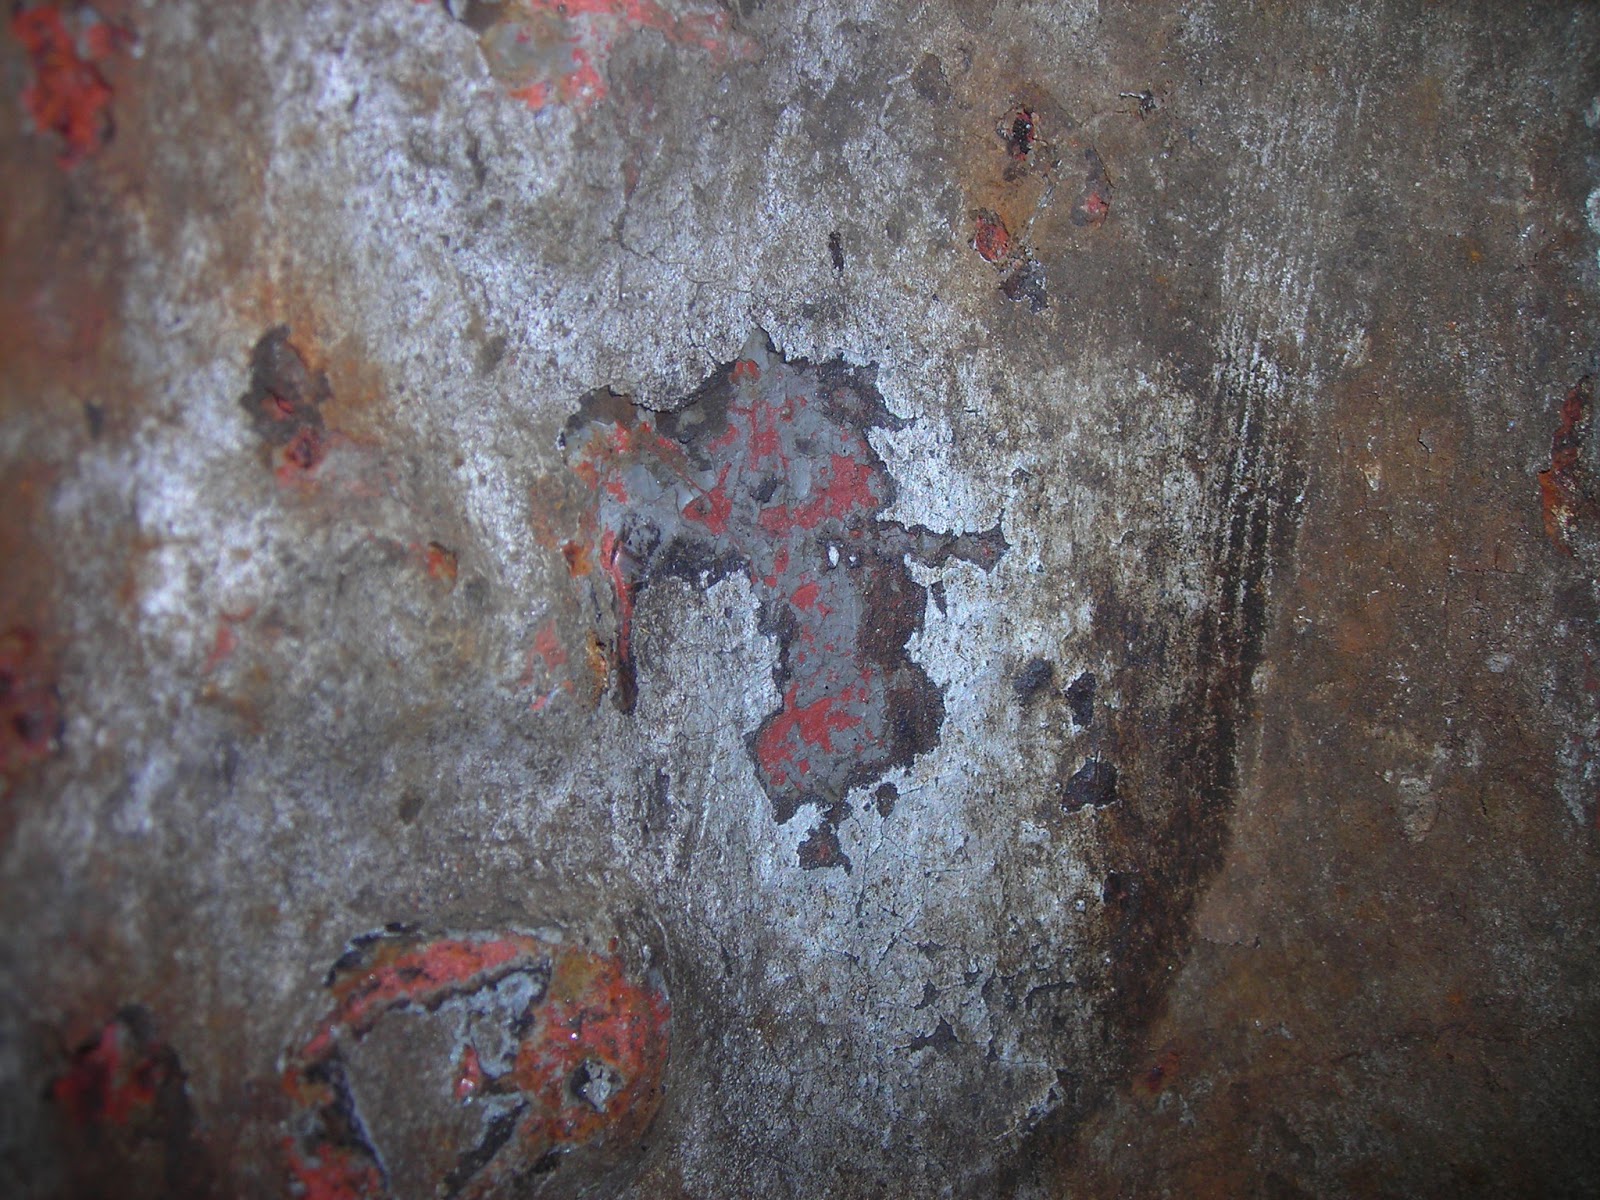
At first glance, BEV seems to be pure rust, but there are still flecks of paint. Even better,
removing the wheels has exposed areas that are inaccessible to someone giving it a quick tart up, and protected by grease. A quick clean up revealed...


The red in the top right isn't actually the colour I'm looking for. Initially I thought this was it, hence BEV was painted red when I did the top half. I now think it is actually red oxide primer, presumably the result of a quick tart up by a previous owner.
Instead, look at the vague arc going bottom right to top left. That is where the wheel was, and where the mystery painter couldn't reach. The black is old grease, and in the middle...the original Grey! The darker flecks are bare metal.

Further investigation found this grey patch on top of the frame:

So thats the lighter colour probably settled. For me, the patch behind the wheels seals it. Theres no more paint behind or on top of it, I doubt industrial owners would take off wheels for a repaint-if they ever painted it-and I reckon if anyone in preservation took a wheel off to paint behind, it'd either have had a more obvious start made or been left in a million bits until scrapped.

The buffer beam edge that shows dark in the photo threw up this:


Again, red is most likely red oxide.The black in the middle seems to be paint, the small flecks of grey beneath are bare metal. At least, the black flicks off with a knife blade leaving the grey flecks behind.

Finally, the wheels:

In the scraped away patch: Silver seems to be a tart up, with thick layer(s) of black beneath, then grey, then red oxide. Why they originally put primer on the wheels yet none apparently on the frames is a mystery, maybe they couldn't be bothered?

So, it looks like light grey (probably battleship grey) and black may be the colours shown in the old photo. Ironically, I've often said we should paint it grey and black because the picture is in grey and black! Besides, it should look very smart like that.

Tuesday 16 July 2013

BEV 551 Part 2

We had another BEV day on monday.

First up, we fetched the remaining wheels off. This was much easier than the first, probably because we knew how hard to hit them!
Here is the extractor. There are two threaded holes in the wheel bosses. I used a plate, two bolts and some soft packing. In this case I used aluminium billet, but any softer metal, or even hardwood, should do. The packing protects the axle end.

Jack and support the loco clear of the rail/floor by an inch or two. Put some plywood under the wheel you're about to attack, in case it needs a soft landing. Assemble as shown, then wind the bolts in to get some tension, making sure they don't bottom out in the threaded holes. If they do, put more packing in.
The wheel may need a few knocks with a soft face mallet to break the rust seal. After that, doing up the bolts alternately should pull it off the axle. Once it moves a bit, it comes off the taper and so is only held back by the key.

Next up, we unbolted the axle boxes. Removing the triangular plates behind each wheel:


We found a nut on a fine thread. Note the grub screw locking the nut in place-the sort of thing easily missed until you scrap your axle. Two came out fine, two broke and had to be drilled out. The nuts had to come off, as the slot in the frame for dropping them out is too narrow:

You can see the fill-in piece of metal under the axle end, and that the nut is removed. You can also see the waxy, gritty 80+ year old grease.

Next up, we tackled the axle keep plates. These are two flat bars that run under the frame, and hold pieces of metal that plug the gaps under each axle that allow them to come out. The bar also put back the strength lost by having 4 huge slots in your frame. The bolts here have taken the brunt of derailments and damp, yet we only had to angle grind 3 of them!

By the end of the day, we had this. The axleboxes are held in by one bolt at the top, so we're about ready to drop them out.


Thursday 11 July 2013

BEV 551 part 1 of millions

This was BEV 551:


Built in 1924 (ish), BEV is an 18" gauge battery electric loco, built for hauling things round factories.  The above is a photo in service, the writing tells you more history. It's a scan from Industrial Narrow gauge Railways of Britain, published by Barton Press.

Many decades later, it looked like this, after arriving from Gloddfa Ganol in wales to Steeple Grange in Derbyshire:


BEV sat under a sheet for a few more years, until a younger, over-optimistic me bought a 49% share in order to start getting it done up a bit.
About a year later, and I had this:


Then work, house and women took over. But at least BEV was kept under cover for the next 5 years.
February this year, I felt I finally have enough room at home to fetch it here and do a bit more. So after a chat with Bob, who owns the other bit, and Dad, who loves moving heavy things and moaning about being asked to do it, most of BEV came to a secret location in [CLASSIFIED].

The painted bits have stayed up the railway for now, so I can spread the chassis over a greater area.
So anyway, BEV arrived, was dumped in the shed and then some bloody enfield got in the way...but monday, work began!

The plan is, roughly, this. First, rip the chassis apart, get it blasted and painted, then reassemble the frames. Next, we overhaul the wheelsets. BEV is so basic it's ridiculous, one motor driving some huge straight cut gears and no suspension at all. So all (!) we need is a good clean, new bearings and some rather pricey gears.
After that, things get a bit murkier. We have the controller and resistance bank, but no motor. Also, if we're fitting a new motor and gears, we might as well pop in some air brakes so it can pull passengers on her triumphant return. Probably in the year I retire, but you never know.


Bit of detail: The staff sticking up is for the brakes, which are removed. The big ugly gears drive a countershaft affair. The motor sits in the middle, sticking out one side. Here's a photo of BEV 640 at the East Lancs Light Railway, thanks to Alan Jones:


So, Bob came over monday, and we took 3 hours to get a wheel off. Not quite Formula 1 territory, but god only knows when they were last off.


Heavy buggers too


This shows the utter pain in the arse we're dealing with. To undo those nuts, you need the wheel off. As far as we can see, dropping out the whole wheelset in the normal way is impossible. Thankfully, you can drop the axles out-I though at first you could only remove that and the gear by splitting the frames


It'll be a long project, but you've got to start somewhere. Interesting change from bikes at any rate. I'm thinking of making up drawings too, and might even have a go at modelling it in 5" gauge. Be useful for air brake design at least. Next work party is this monday, so we might get another one off!